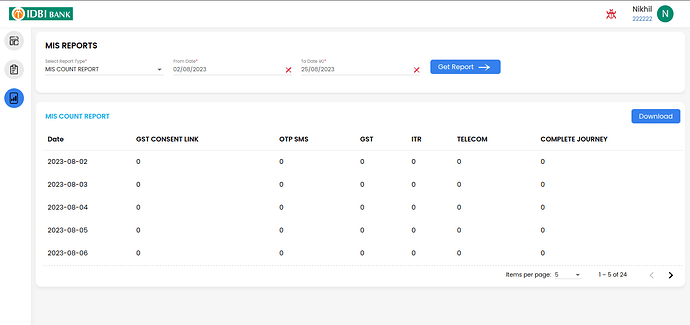
How to configure table element in vflow based on the response from DBES API
@Nikhil.Dhanda
Go to components section in vFlow , Click on Add table component
Then this fields appears-
- Mention the table name and description.
- You can select the properties as follows-
-
Display Pagination - This property allows you to display the table’s data across multiple pages. To see the complete table, the user can navigate from one page to another page.
-
Global Search - After you click the Global Search check box, this property makes the “Global Search” element available in the component. By using the “Global Search” element, you can search the data in the “Table”.
-
Search Bar - When you click the Search Bar check box to activate this property, it allows you to display the Search box with the table.
-
Fix Header - When you click the Fixed Header check box to activate this property, it makes the header row static. It means that you cannot scroll the header row.
-
Color Coding for Rows - When you click this check box, the application displays the row’s background color based on the configuration of the colorCode property in the “Table” component’s data source.
-
Make Row Clickable - When you click this, the end-user can click in the row’s cell.
-
Highlight Row -On selecting this the table displays the rows with a highlighted effect.
-
Table Header Row Height - In this field, you can enter the header’s row’s height in pixel, VH, or percentage units.
-
Row Height - In this field, you can enter the data cell’s row’s height in pixel, VH, or percentage units.
-
After the selection of properties and UI properties, you have to Add the data source of the table. It can be ONLINE for getting data by Service Call / OBJECT for using existing data / MOCK for running by mock data.( For DBES API you have to configure API first and then enter the path of response in data source keeping it as Object or you can run API on the run time of table using Online data source.)
-
Submit the Configuration of element.
-
Open the configuration of element in table component.
-
Add elements and provide the details:
- Name - table row details
- Add rest of the desired UI properties.
- In additional properties: Keep data source as ‘Object’ along with the data path. Remember : Data path of the element will be same as of key in JSON array of the table, There are separate elements for every different key.
- You can have multiple elements within one table component.
- Click Submit to add the element and the table component.
For reference screenshot is attached below-
Additionally, we can use Custom CSS to make our tables attractive.
Please refrain asking duplicate questions
@Nikhil.Dhanda Is this table allows inline editing means if I want to edit data of OTP SMS in 3rd row. Is this possible?
Yes, You can make the whole column editable. All the fields in that column will be editable. When the user double clicks on a particular field of that column it will be editable (not just 3rd particular field separately)
To configure this, select the Editable checkbox in the properties section on the Element.
Thanks @Nikhil.Dhanda for answering

