Multimedia Management Use Case
This use case demonstrates how to configure and implement multimedia management. It includes opening the camera to capture images and viewing images in a list format.
Functionality Overview
- Open Camera: Captures an image using the device’s camera.
- View Image: Displays the captured images in a list format.
- Data Storage: Images are stored in the DMS and retrieved as needed.
Configuration Steps
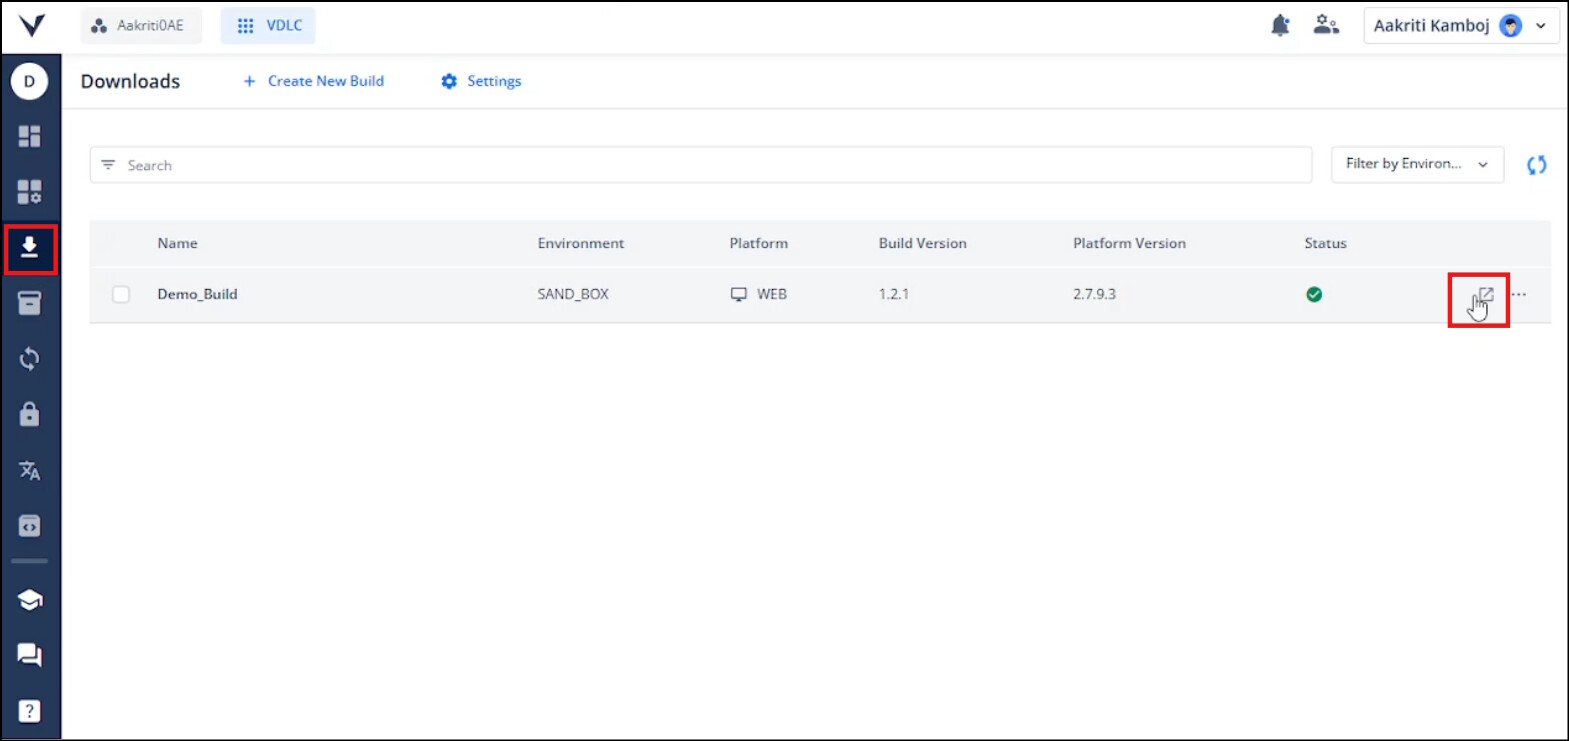
- Setting up to create build
- Obtain a storage ID and DMS bucket name from the Infra team.
- Configure these values in the Settings section under Download.
- Update the version name and version code for Android, IOS, and PWA. Then click on Save.

- Generate a New Build.

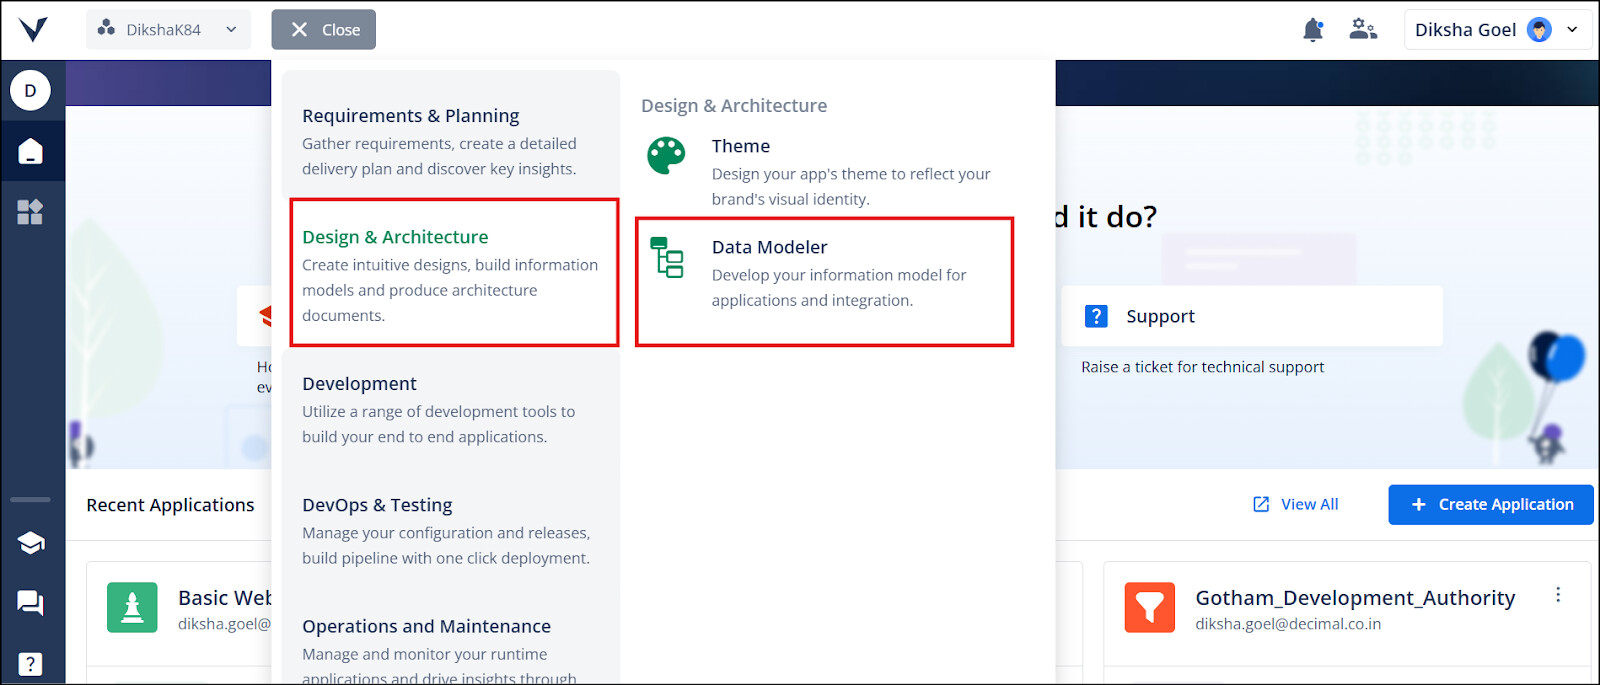
- Creating Data Model and Entities
- Navigate to Data Modeler, go to the nine dots
 in the top panel (VDLC), navigate the Design & Architecture, and then select Data Modeler.
- Create these three following additional entities:
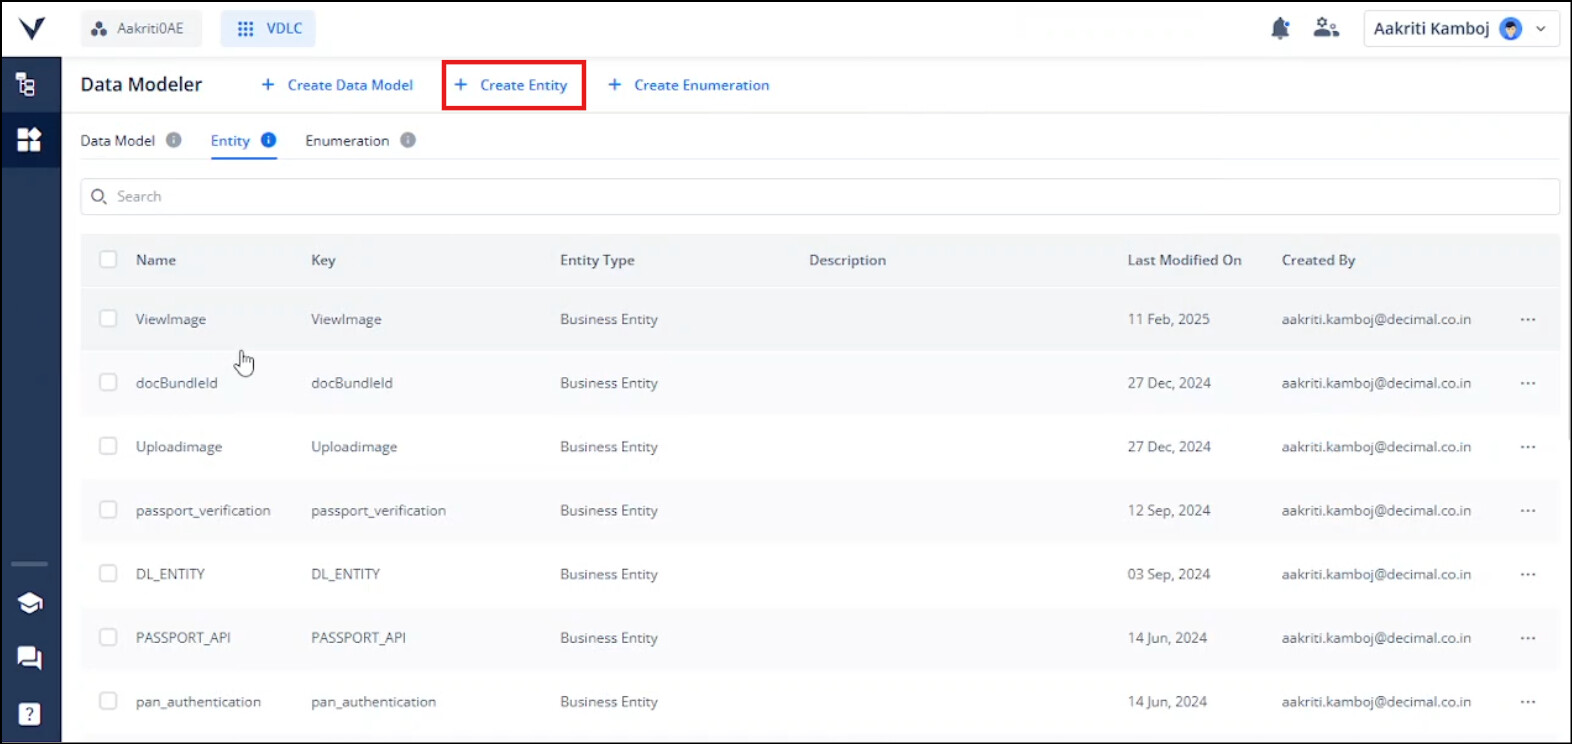
- Name: DocBundleID, Type: Business Entity, Click on Create.
- Double-click on the created entity, provide { “DocBundleId”: “String” }
- Click on save.

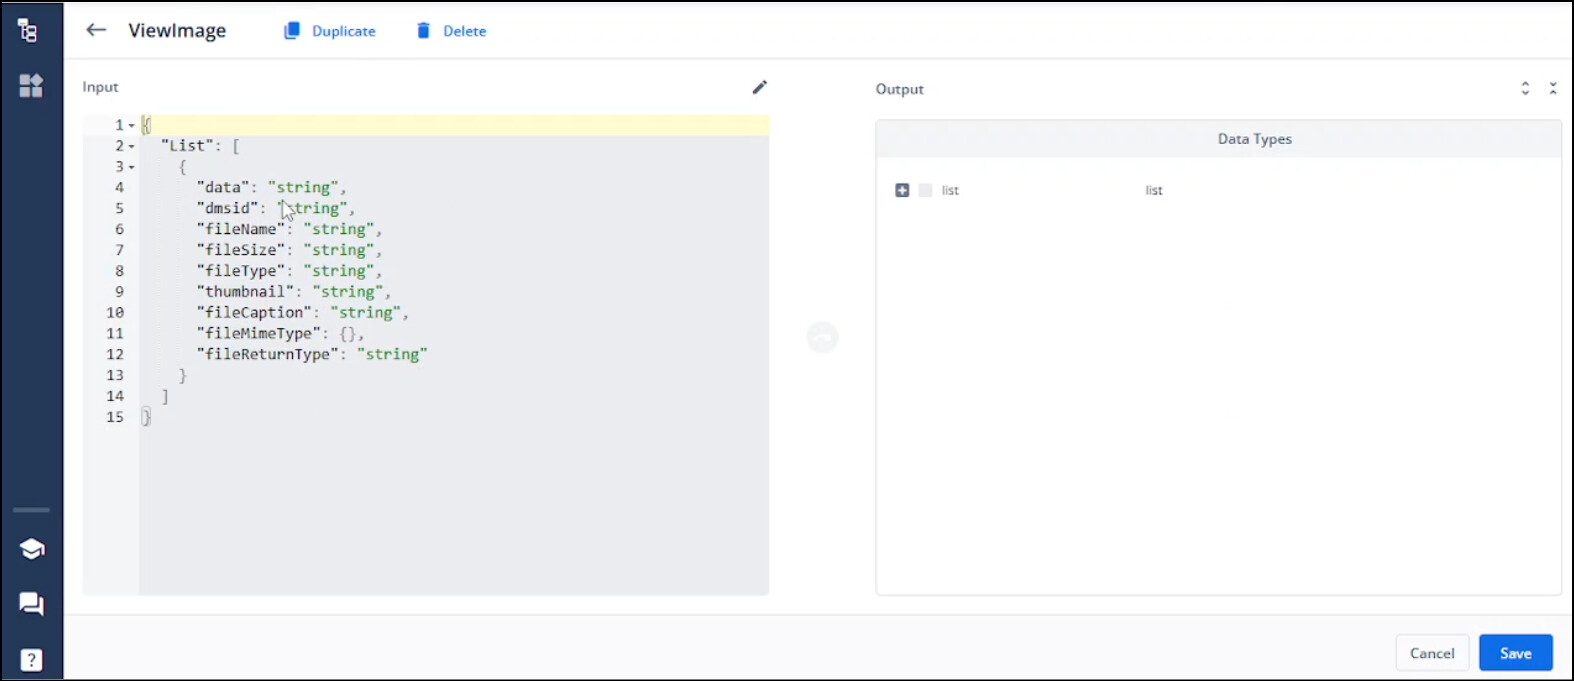
- Name: View Images, Type: Business Entity, Click on Create.
- Double-click on the created entity and provide the following JSON:
{
“List”: [
{
“data”: “string”,
“dmsid”: “string”,
“fileName”: “string”,
“fileSize”: “string”,
“fileType”: “string”,
“thumbnail”: “string”,
“fileCaption”: “string”,
“fileMimeType”: {},
“fileReturnType”: “string”
}
]
}
- Click on save.
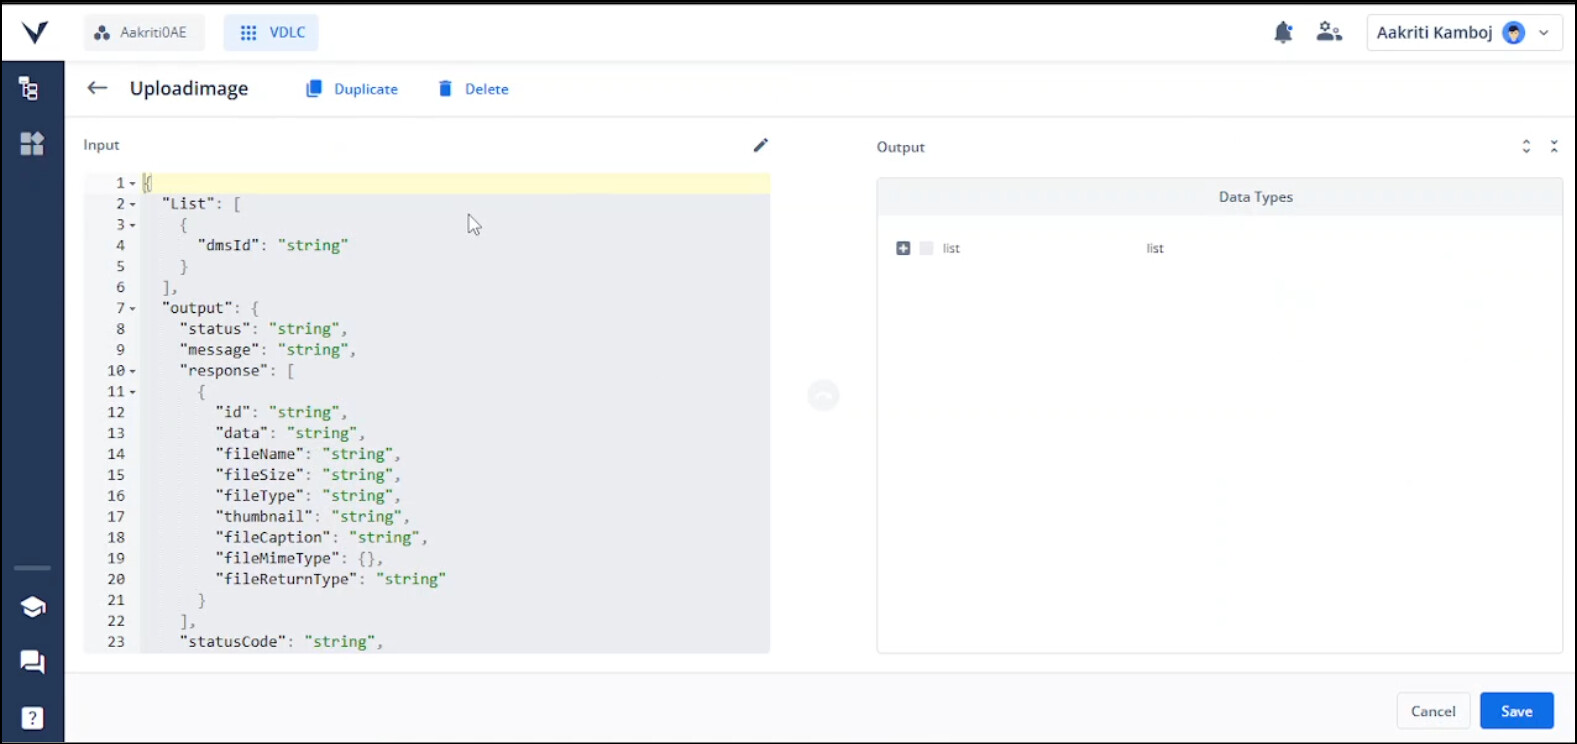
- Name: Upload Images, Type: Business Entity, Click on Create.
- Double-click on the created entity and provide the following JSON:
{
“List”: [
{
“dmsId”: “string”
}
],
“output”: {
“status”: “string”,
“message”: “string”,
“response”: [
{
“id”: “string”,
“data”: “string”,
“fileName”: “string”,
“fileSize”: “string”,
“fileType”: “string”,
“thumbnail”: “string”,
“fileCaption”: “string”,
“fileMimeType”: {},
“fileReturnType”: “string”
}
],
“statusCode”: “string”,
“errorResponse”: {}
}
}
- Click on save.
- Link all these entities to the data model:
- As you already know how to create a data model, create one named Demo_1, double-click on it, and then click on ‘Link Entity.’ Select the entities and click on Link.

-
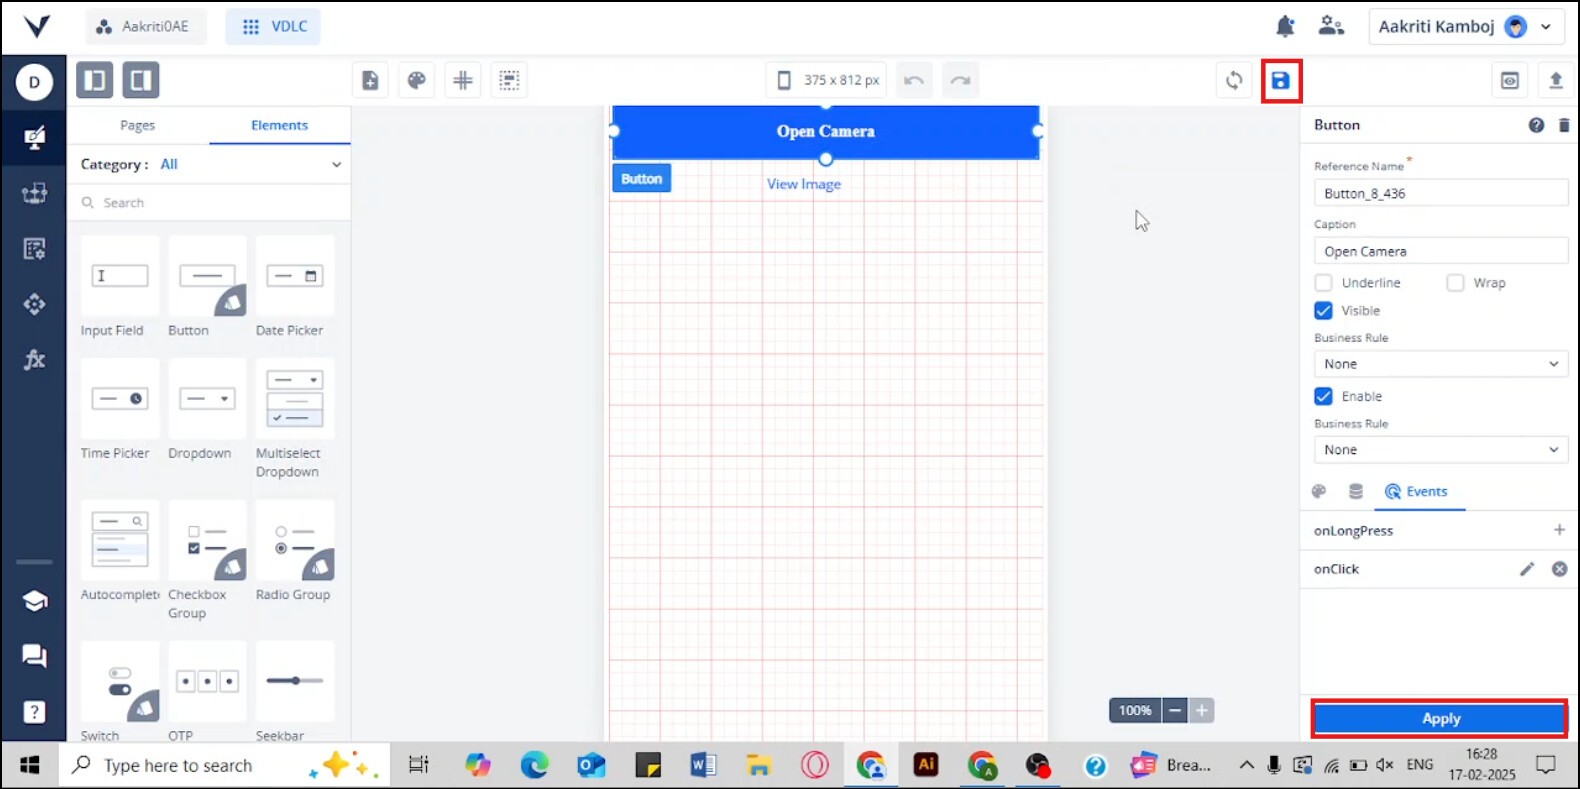
Designing UI
-
Create a page named Media Management with two elements: Button (Open Camera) and text (View Image)
-
Configuring Open Camera
- Go to Elements, search for a button, and drag and drop it on the canvas.
- In vDesigner, under properties, go to events, click on the ‘+’ icon of the OnClick event, and add a task group. Provide a name to the task group (OpenCamera)
- Now, add the Open Camera task and fill the following:
- Reference Name: Assign a unique name (e.g. Open Camera_1).
- Camera Mode: Set to Take Picture.
- Default Mode: Set to Front Camera.
- Camera Resolution: Set to Medium.
- Doc Type: Provide data in Static, Set to JPEG, and Value: string.
- Doc ID: Assign a static data: XYZ, Value: string).
- Doc Bundle ID: Assign a data: XY and value: string.
- Set Min and Max File Allowed to 1.
- Check the Upload Media and Delete Media checkboxes.
- Map the output location to the Upload Media entity you created (search for the Attribute and then select list).
- Save the configuration.
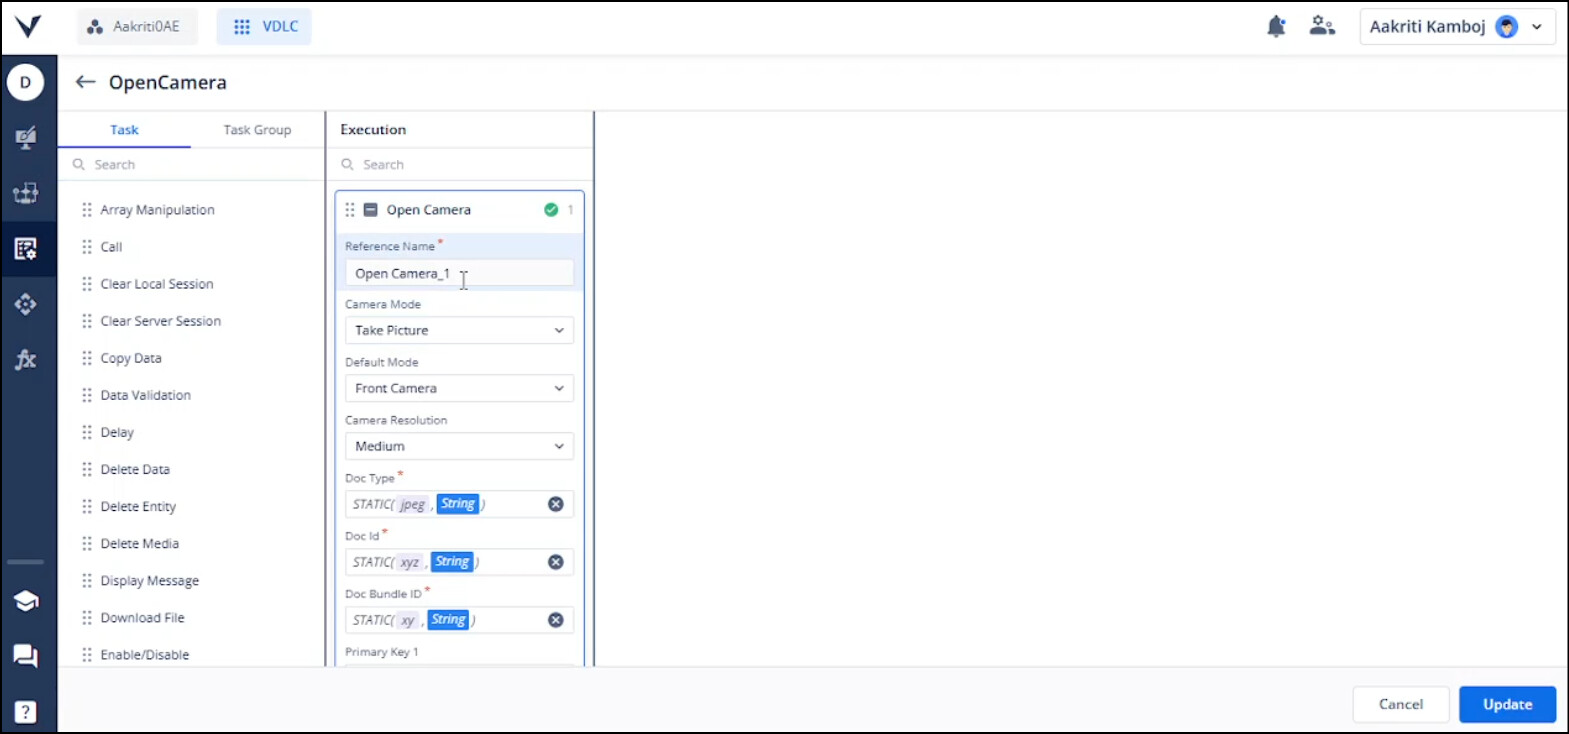
- Click on Apply and Save.
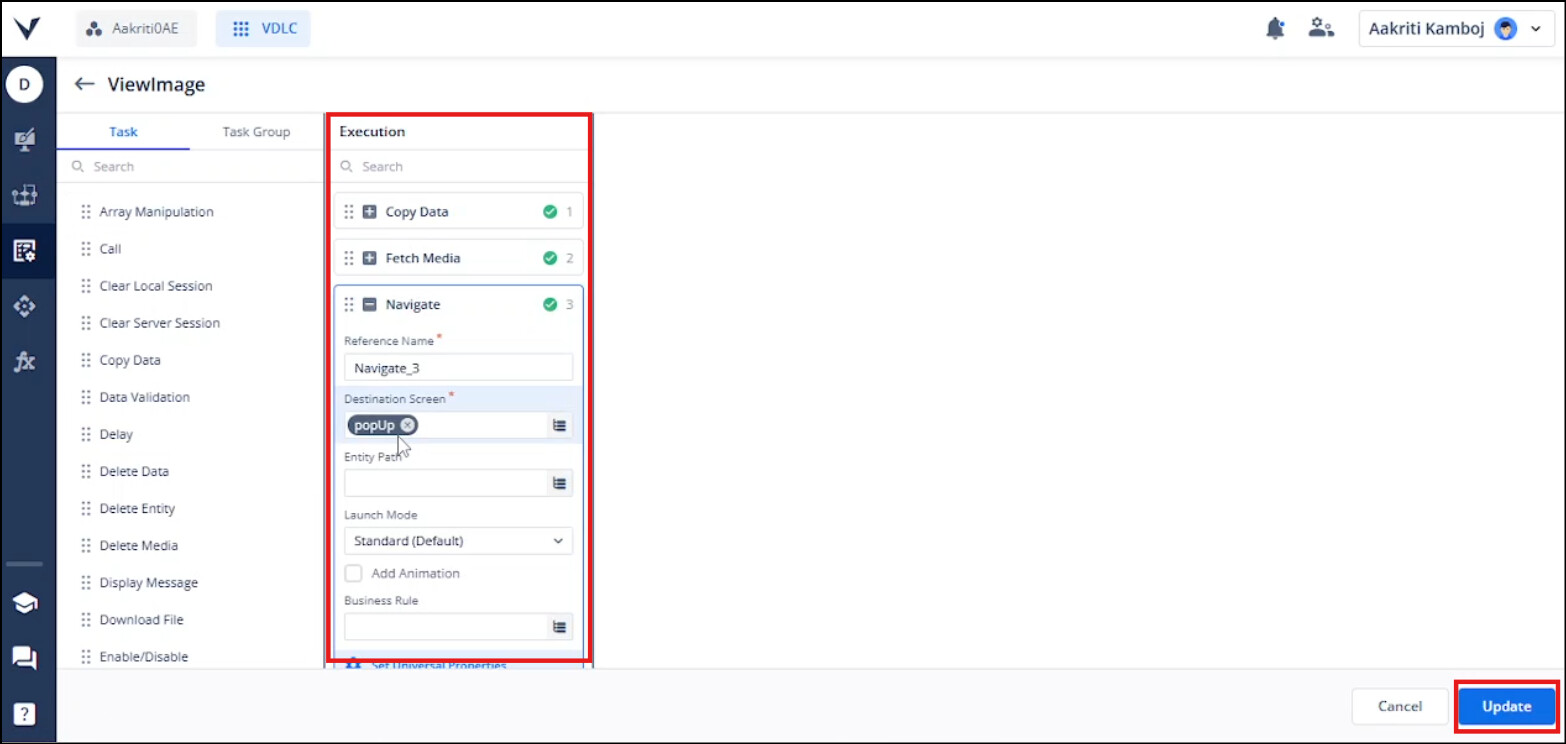
- Configuring View Image
- Go to Elements, search for text, and drag and drop it on the canvas.
- In the properties, set the alignment in the center and set the top margin to 10 under Alignment & spacing. Click on Save.
- Click on the pencil icon of the OnClick event under Event from the View Image button properties:
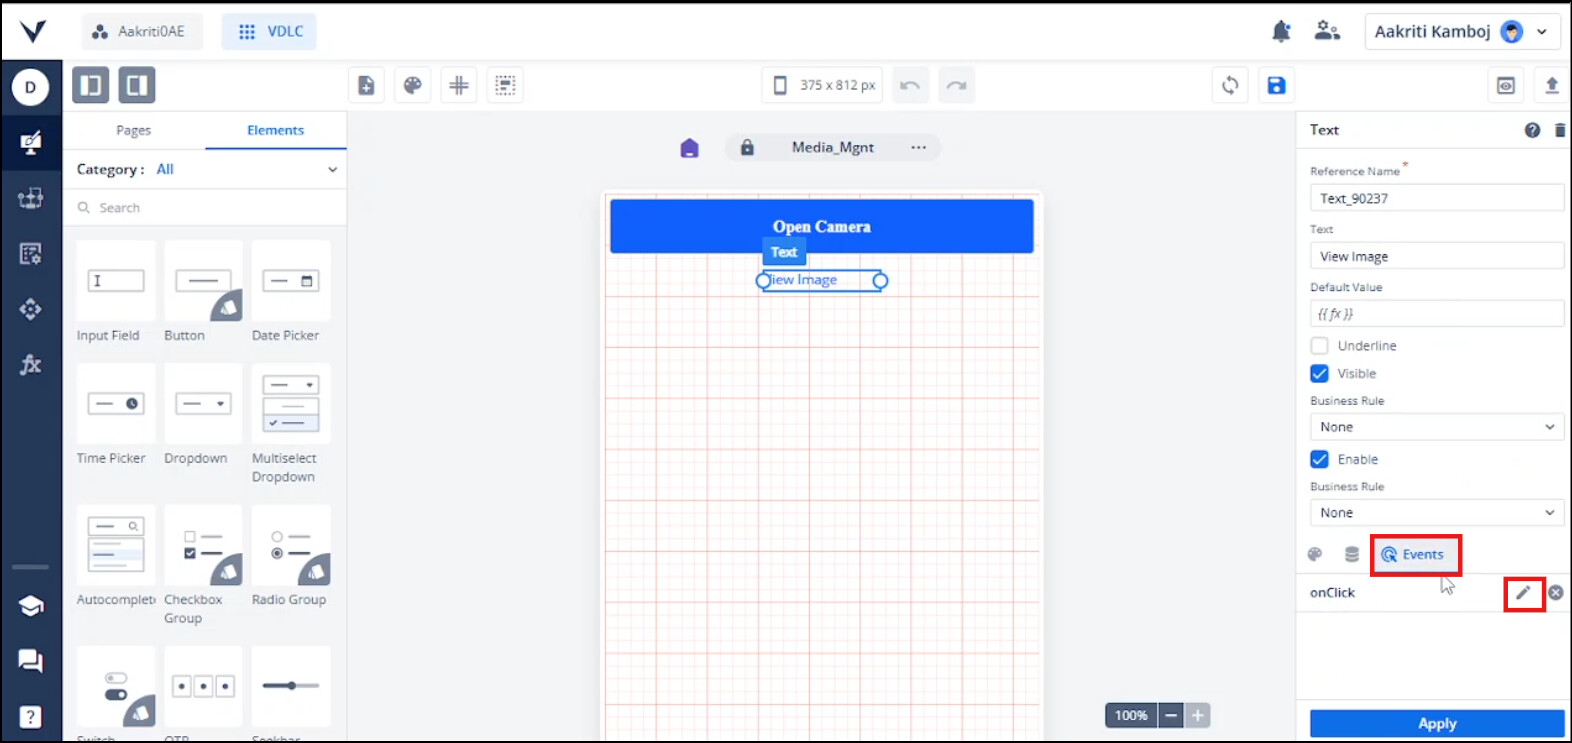
- Create a Task Group (e.g., ViewImage)
- Create a Task Sequence:
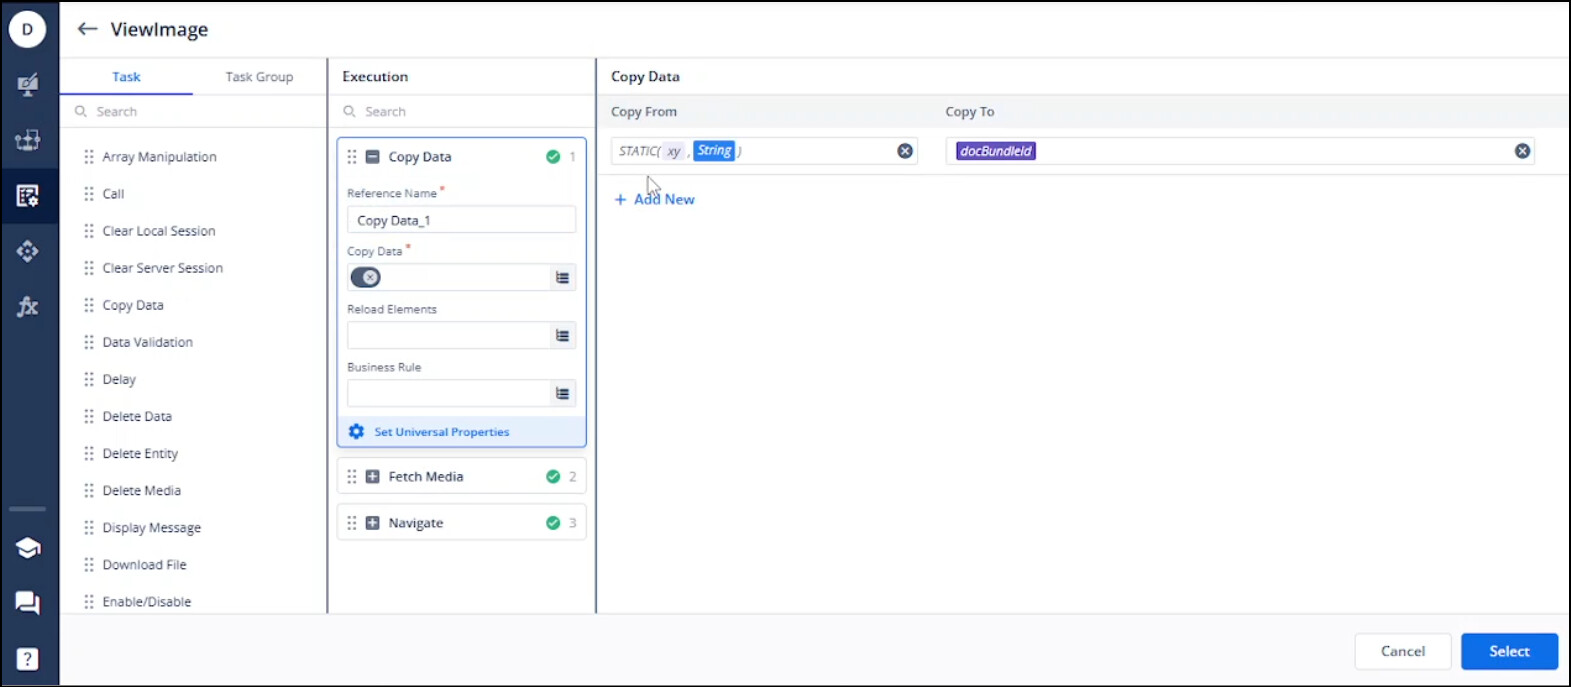
- Copy Data Task:
- Drag and drop this task into the execution section.
- Provide “static values (XY, string)” in ‘Copy from’ and map it to the Doc Bundle ID in ‘Copy to’ in the data model.
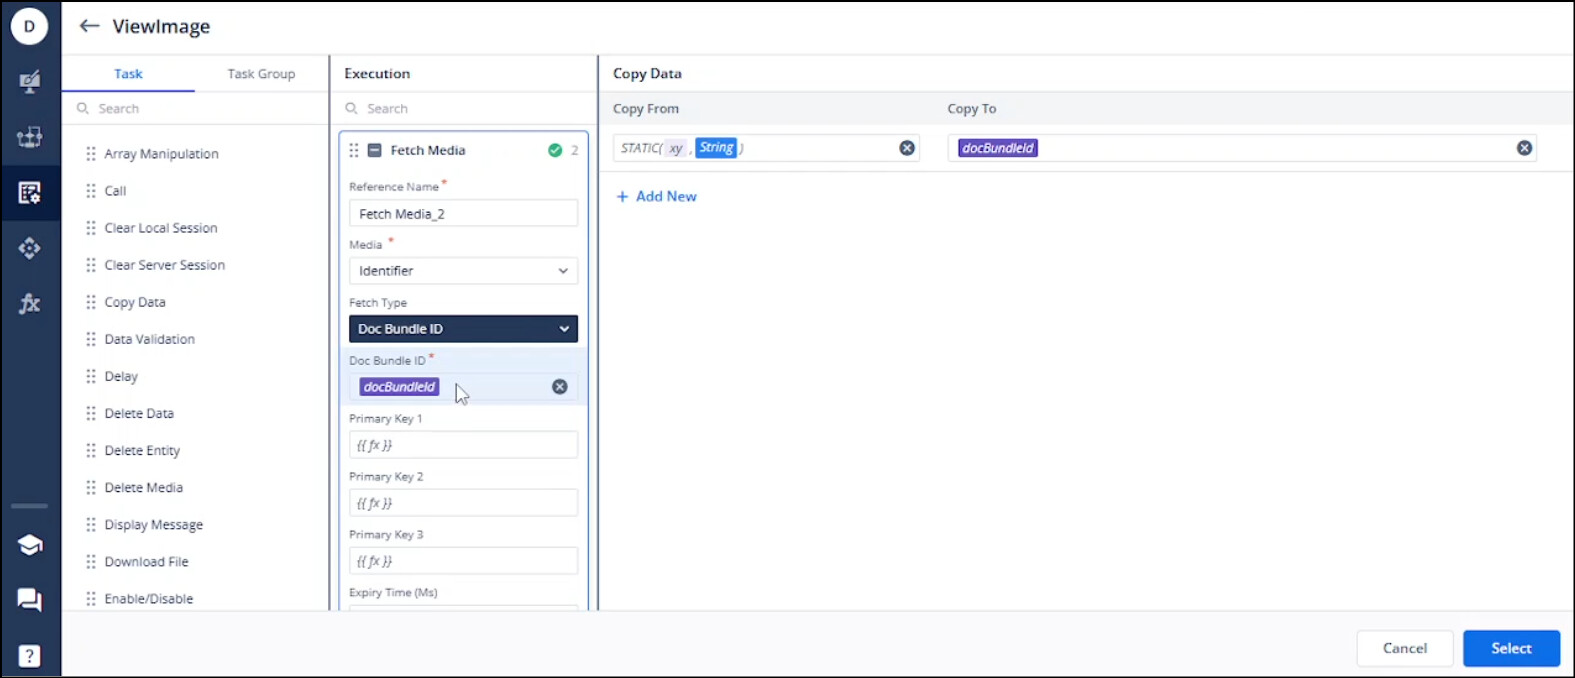
- Fetch Media Task:
- Drag and drop this task into the execution section.
- Set Reference name: Fetch Media_2
- Set Media as Identifier
- Select DocBundleID as the fetch type.
- Under DocBundleID, search for Attribute, and search DocbundleID.
- Map the output location to the view image entity you created (search for the attribute and then select the list).
- Click on Select.
- Navigate Task:
- Drag and drop this task into the execution section.
-
Save the configuration.
-
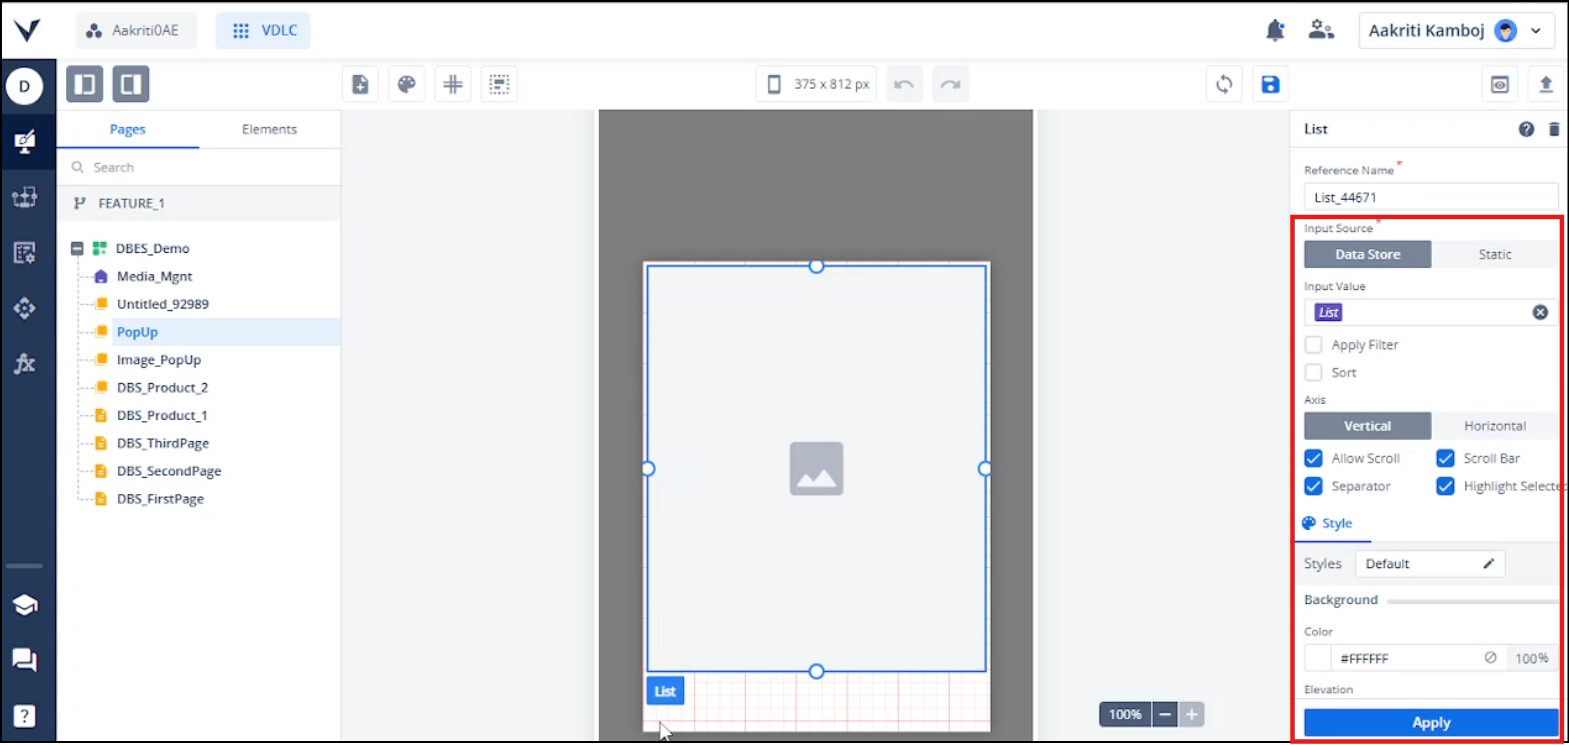
Create a pop-up page with an image and list element.
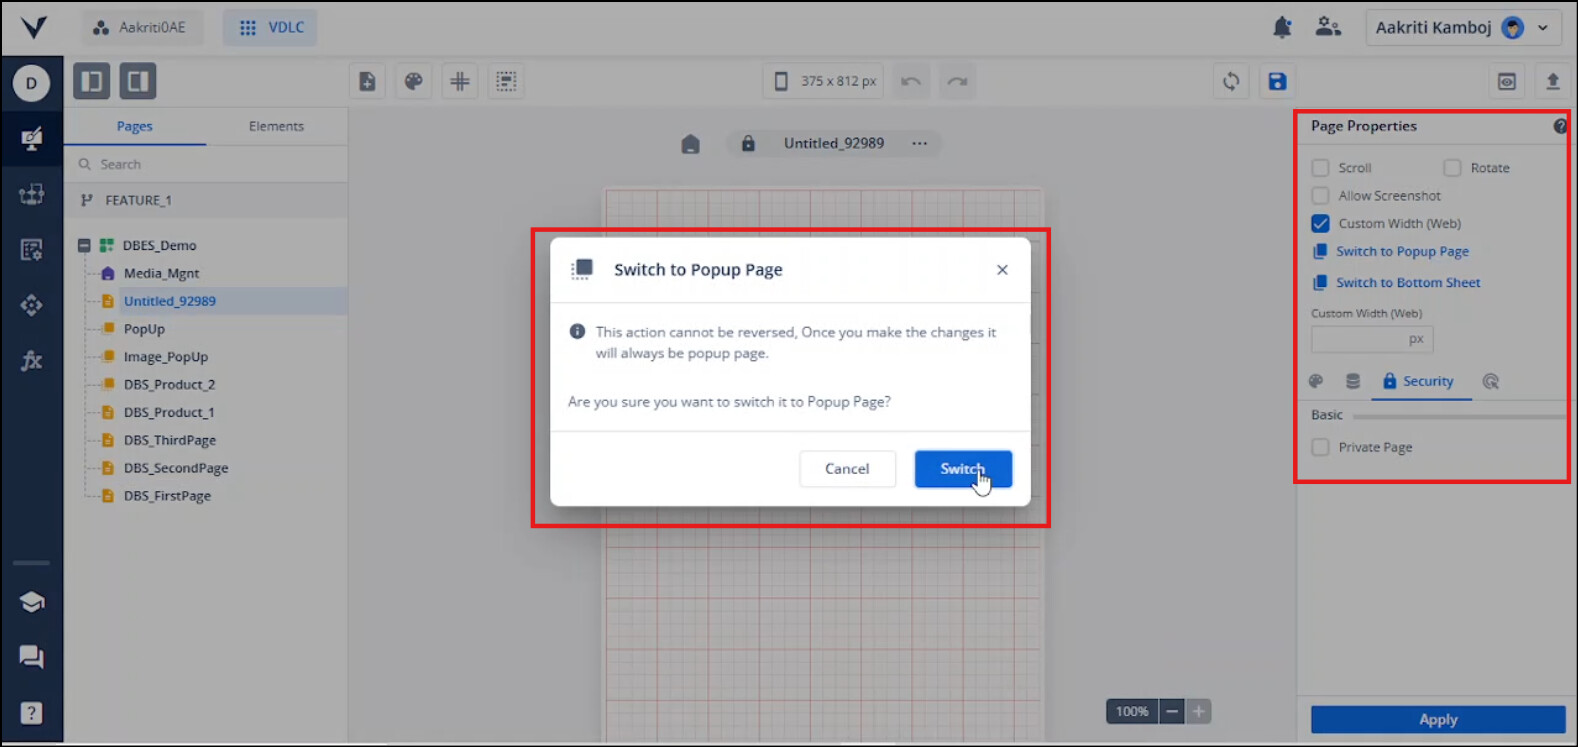
- To create a popup screen on the vDesigner canvas, click on the “Create Page” option from the top.
- Click on the “Switch to Popup Page” option in the page properties on the left.
- A pop-up page will appear on your screen with the name “Switch to Popup Page.” Click the “Switch” button to convert your page into a pop-up page.
- Search for the list element under the “Elements” tab and drag and drop it onto the popup page.
- Adjust the list by dragging it from different directions to fit the popup page completely.
- Again, go to the element section, search for the image, and drag and drop it on the canvas under the list.

- Select the List Element from the hierarchy and configure:
- Input Source: Select Data Store
- Under Input Value: Search for an attribute, and then search the list of view images and select it.
- Enable Scroll Bar, Allow Scroll, separator, and Highlight selected.
- Click on Apply.
- Then, go to the hierarchy on the canvas, click on the image, and go to its properties.
- Provide the name (data) to the list attribute ID.
- Under input source, select URL.
- Under enter image URL, provide the URL.
Url link: undefined | Business Entity | List.demo_1.businessEntity.ViewImage.List
- Click on Apply and Save the configuration.

- Now, go to the media management page, go to your task group, click on the edit icon, and open the navigate task you dragged, map the pop-up page you just created in the destination screen, and click on Update.
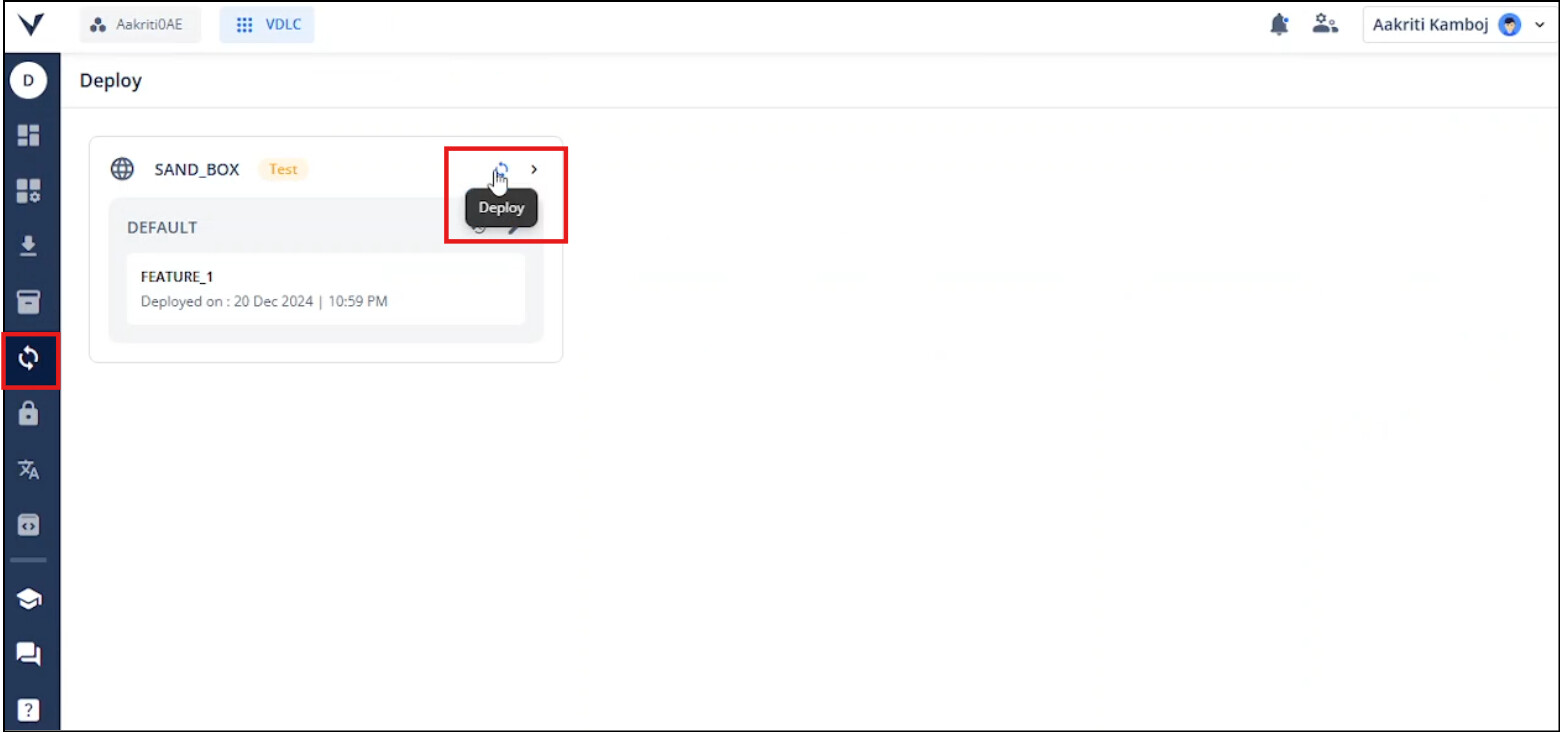
- Sync and Deploy
- Go to the vDesigner, click on Apply, save, and commit the changes.

- Sync the changes from the Application dashboard. Go to the deploy, click on the deploy icon, and then check your build.